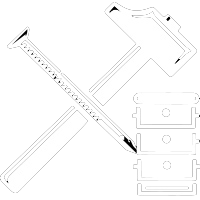
Honey shut-off valves
Discharge valves for tanks of all shapes and sizes. These valves are essential for emptying tanks and can also be used for filling honey jars. The cut-off discharge valve is made of food-grade certified plastic or stainless steel. For example, a plastic valve with a 6/4″ external thread is suitable for use with stainless steel or plastic honey storage tanks. For use with plastic storage tanks, we recommend also purchasing a seal and replacing it as needed. In the accessories section, you can also find sealing rings for other plastic valves.
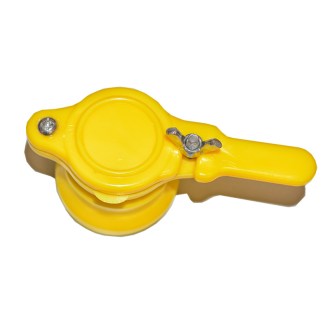
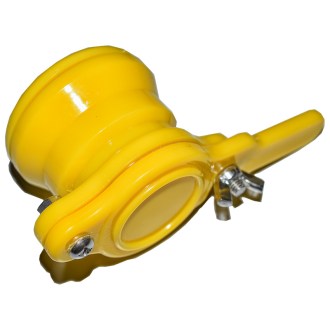

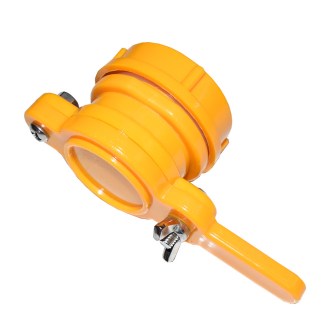


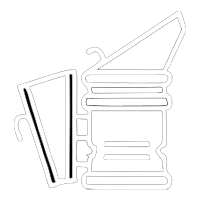
Plastic Shear-Type Honey Gate Valves
Filling honey into jars places high demands on both accuracy and cleanliness. Plastic shear-type gate valves are a practical and affordable solution that allows beekeepers to fill jars smoothly and cleanly without unnecessary losses. Whether you are just starting out in beekeeping or have many years of experience, a reliable valve will make your work easier and prevent unwanted dripping and sticky mess.
Why a shear valve is so useful when bottling honey
Honey is a viscous substance, and standard outlets or simple taps often continue to drip for a while after closing. A shear-type design works differently: the closing element literally “cuts off” the flow of honey. The result is significantly less residual dripping, cleaner jar rims, and less time spent wiping and cleaning. This is especially appreciated when bottling thicker honeys (for example honeydew honey) or when working with honey that is already beginning to crystallize and therefore offers greater resistance to flow.
These valves are suitable for standard beekeeping operations as well as home honey rooms, where they speed up filling, improve dose control, and help keep the bottling area clean even when filling dozens of jars repeatedly.
Main advantages of the plastic design
Plastic valves are popular among beekeepers as a cost-effective and practical solution. They are usually made from food-grade plastic (such as nylon or ABS) intended for contact with food. In practice, this brings several advantages:
-
Cleaner bottling: the shear principle limits dripping after closing and helps keep jars and work surfaces free from stickiness.
-
Smooth dosing: the valve is easy to operate and allows comfortable filling of jars, bottles, and smaller containers.
-
Low weight: it does not burden bottling containers and is easy to handle even with frequent removal.
-
Corrosion resistance: plastic does not rust and generally does not react with the components of honey.
-
Easy maintenance: the smooth material is easy to wash, and honey usually adheres to it less than to more porous surfaces.
-
Replaceable seals: selected models allow replacement of seals or internal closing parts, extending service life.
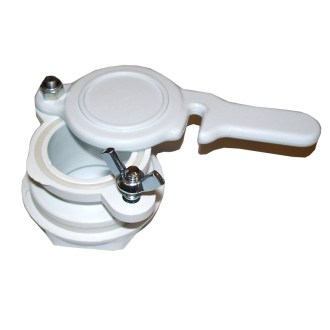
How the shear (knife) mechanism works
A shear valve is sometimes also described as a knife valve or a guillotine gate mechanism. The principle is simple: honey flows through the outlet, and when the valve is closed, the flow is shut off by a sliding “gate” that interrupts the stream at the outlet point. This significantly reduces the formation of long honey strings and subsequent dripping.
Closing is fast and precise: the valve “cuts” the honey stream at the moment of closing, so you do not have to wait for the last drops to run out.
Tightness is usually ensured by sealing elements (such as O-rings), which help keep the valve closed without leakage and also contribute to smooth operation even during longer bottling sessions.
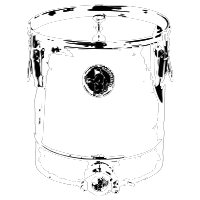
Where you will use the valve in practice
Plastic shear-type outlet valves are most commonly used on bottling tanks and settling tanks, as well as on other containers intended for handling honey in the honey room. They are also useful when transferring honey between containers or when filling through a strainer. If you bottle several types of honey during the season, you will appreciate the ability to quickly disassemble, clean, and prepare the valve for the next batch.
The valve is also suitable wherever honey needs to be dosed “jar by jar” with good flow control—for example when filling customer containers or bottling multiple batches one after another.
Choosing the right size and compatibility
To ensure the valve works without compromise, it is worth checking compatibility with your container before purchasing. Common sizes on the market include DN40 (1 1/2") or DN50 (2"). In general:
-
Smaller flow diameter: suitable for more precise filling of smaller jars and for beekeepers who want close control over the dose.
-
Larger flow diameter: ideal for faster bottling of larger volumes, where flow rate and time savings are the priority.
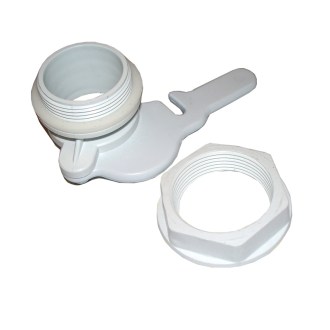
Also pay attention to the type and size of the thread and whether the valve is supplied with a lock nut and seal. Properly seated sealing is key to trouble-free operation without leakage.
Installing the valve on a bottling container step by step
Installation is usually straightforward and can be done without special tools—the important thing is to ensure the correct hole diameter and proper seating of the seal.
Valve installation procedure
-
Prepare a hole of the correct diameter: in plastic containers, a hole of approximately 40–45 mm is most commonly drilled, but always follow the specifications of the particular valve model and the wall thickness of the container.
-
Insert the valve with the seal: it is usually inserted from the outside of the container so that the seal seats evenly.
-
Tighten the lock nut: screw on the lock nut from the inside and tighten carefully—the goal is tightness, not deformation of the plastic.
-
Check for leaks: before bottling, perform a short test (for example with water or a small amount of honey) and verify that there is no leakage.
Practical note: with plastic parts, avoid overtightening. Excessive force can damage the thread or sealing surface and thus worsen tightness.
Maintenance after bottling: keeping the valve tight and easy to operate
After each bottling session, rinse and clean the valve. If the model is disassemblable, it is worth taking it apart, checking the seating surfaces, and removing honey residues that could later crystallize. This helps maintain smooth operation of the closure and reduces the risk of leakage.
-
Wash with warm water (excessively hot or boiling water can cause deformation in some plastics).
-
Allow to dry thoroughly before reassembling and storing the valve.
-
Check the seals—O-rings must be clean, free of cracks, and properly seated.
Tips for smooth, fast, and accurate honey bottling
-
Stable stand: place the container on a firm, level surface—during filling it must not wobble, otherwise it is harder to aim at the jar opening.
-
Correct outlet height: allow enough space for jars and ensure you can comfortably close the valve with one hand.
-
Work with honey temperature: cooler honey flows more slowly (often more precisely), warmer honey is more fluid and bottling is faster—adjust the valve diameter accordingly.
-
Use the shear effect: close smoothly without jerking—the stream is “cut” more cleanly and the jar rim remains less sticky.
Who the valve is suitable for
A plastic shear valve is a practical choice for beginner beekeepers as well as for those who bottle regularly in small to medium volumes. It fits home honey rooms, operations with multiple apiary locations, and also serves well as a spare valve for different containers or for separate batches (e.g. blossom honey, linden honey, honeydew honey).
Frequently asked questions
- Is a shear valve suitable for thick honey?
-
Yes. With thicker honeys, the advantage of the shear closure is most noticeable—after closing, it usually drips significantly less and does not form long “strings”.
- Can the valve be cleaned easily?
-
Plastic designs are generally very easy to wash. With disassemblable models, cleaning is the most convenient—you can easily access the seals and seating surfaces.
- What should I pay attention to when installing it in a plastic container?
-
Above all, ensure the correct hole diameter, even seating of the seal, and careful tightening. Excessive tightening can damage the thread or sealing surfaces.